Getting a new HVAC system can feel overwhelming, but knowing what to expect during an HVAC replacement makes the process much smoother. Most homeowners can expect the installation to take 1-3 days, depending on system complexity and home setup. The process involves removing your old system, installing new equipment, connecting ductwork, and testing everything to ensure proper operation. Proper preparation and understanding each step help you plan accordingly and ensure a successful installation.
HVAC Replacement Timeline Overview
| Phase | Duration | What Happens |
| Pre-Installation | 1-2 weeks | Permits, ordering equipment, scheduling |
| Day 1 | 6-8 hours | Remove old system, prep installation area |
| Day 2 | 4-6 hours | Install new equipment, connect systems |
| Day 3 | 2-4 hours | Testing, calibration, final walkthrough |
| Post-Installation | 1-2 days | Follow-up, warranty registration |
Pre-Installation Preparation
Before your HVAC replacement begins, several important steps happen behind the scenes. Your contractor will obtain necessary permits, which typically takes 3-5 business days. During this time, they’ll also order your new equipment and schedule delivery.
You can prepare your home by clearing pathways to your current HVAC equipment and removing any valuable items from work areas. Move furniture away from vents and ensure easy access to electrical panels. Consider arranging temporary accommodations if you have young children, elderly family members, or pets who might be sensitive to temperature changes during installation.
Most contractors will call 24-48 hours before installation to confirm timing and answer any last-minute questions. This is also when they’ll provide specific arrival times and crew size information.
Day One: Removal and Site Preparation
The first day of your HVAC replacement focuses on removing your old system and preparing for the new installation. Technicians typically arrive early morning and start by shutting off power and gas connections to your existing equipment.
The removal process involves disconnecting refrigerant lines, electrical connections, and ductwork from your old system. If you have an older system, technicians must properly recover and dispose of refrigerant according to EPA regulations. This environmental protection step is required by law and adds time to the process.
Expect some noise during removal, especially if your old system is in a tight space like an attic or basement. Crews will protect your home with drop cloths and protective coverings, but some dust and debris are normal. Most removal work finishes by late afternoon, leaving your home without heating or cooling overnight.
Equipment Installation Process
Day two typically brings the most exciting part of your HVAC replacement – installing your new system. Technicians start by positioning the new indoor and outdoor units, which requires careful measurement and leveling.
Installation involves multiple connections including refrigerant lines, electrical wiring, condensate drainage, and ductwork attachments. Modern systems often require upgraded electrical circuits, which licensed electricians handle during this phase. Gas connections for furnaces also need professional installation and pressure testing for safety.
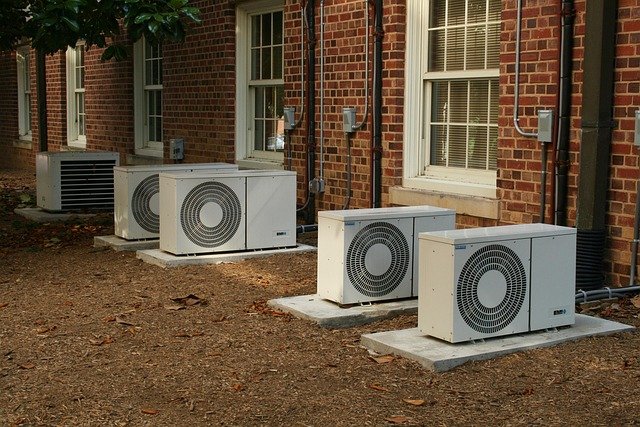
The outdoor unit installation includes setting up a proper pad and ensuring adequate clearance for airflow and maintenance access. Proper positioning is crucial for system efficiency and longevity, so technicians take time to get placement exactly right.
Ductwork Modifications and Connections
Many HVAC replacement projects require ductwork modifications to accommodate new equipment specifications. Modern systems often have different airflow requirements than older models, necessitating duct sizing adjustments.
Common ductwork changes include installing new return air ducts, modifying supply vents, and sealing any leaks discovered during installation. Some homes need additional ductwork to improve airflow balance and system efficiency. These modifications ensure your new system operates at peak performance.
Technicians will also inspect and clean existing ductwork before connecting it to your new system. Clean ducts improve air quality and prevent debris from entering your new equipment, protecting your investment from day one.
System Testing and Calibration
The final installation day focuses on testing and calibrating your new HVAC replacement system. Technicians run comprehensive checks on all electrical connections, refrigerant levels, and gas pressures to ensure everything meets manufacturer specifications.
Performance testing includes checking airflow rates, temperature differentials, and system cycling patterns. Modern systems have sophisticated controls that require programming for your specific home and preferences. This calibration process ensures optimal comfort and energy efficiency.
Safety testing is equally important, with technicians verifying proper ventilation, gas leak detection, and emergency shutoff functions. All safety systems must pass inspection before the installation is considered complete.
What to Expect During Installation Days
Noise levels during HVAC replacement vary throughout the process, with the loudest work typically occurring during removal and major equipment positioning. Most contractors work between 7 AM and 6 PM to minimize disruption to neighbors.
Your home will experience temperature fluctuations during installation, especially when the old system is removed but the new one isn’t operational yet. Plan accordingly by having extra blankets available in winter or fans ready for summer installations.
Expect 2-4 technicians working in your home during peak installation periods. Professional crews work efficiently while respecting your property, but having multiple people working means more activity than usual in your living space.
Potential Challenges and Delays
Several factors can extend your HVAC replacement timeline beyond the typical 1-3 days. Weather conditions significantly impact outdoor work, with extreme temperatures, rain, or high winds potentially causing delays.
Unexpected issues like outdated electrical systems, structural modifications, or permit complications can add time to your project. Older homes often present unique challenges that aren’t apparent until installation begins, such as asbestos insulation or non-standard ductwork configurations.
Supply chain delays occasionally affect equipment delivery, though reputable contractors typically order equipment well in advance. Communication with your contractor helps you stay informed about any potential delays and alternative solutions.
Cost Considerations and Payment Timing
HVAC replacement costs vary widely based on system size, efficiency ratings, and installation complexity. Most contractors require a deposit when signing the contract, with the balance due upon completion.
Additional costs may arise from necessary electrical upgrades, ductwork modifications, or permit fees. Transparent contractors discuss potential additional costs upfront, but some issues only become apparent during installation.
Many homeowners take advantage of manufacturer rebates, utility incentives, and financing options to manage HVAC replacement costs. Planning your budget with a 10-15% contingency fund helps cover any unexpected modifications or upgrades.
Post-Installation Follow-Up
After your HVAC installation completes, expect a thorough walkthrough with the lead technician. They’ll explain your new system’s operation, show you important components, and demonstrate thermostat programming.
Warranty registration typically happens within 30 days of installation, and many contractors handle this process for you. Keep all documentation, including permits, warranties, and operation manuals, in a safe place for future reference.
Most contractors schedule a follow-up visit 30-60 days after installation to check system performance and address any questions. This follow-up ensures your new system operates optimally and catches any minor adjustments needed after initial operation.
Frequently Asked Questions
How long does a typical HVAC replacement take? Most HVAC replacement projects take 1-3 days, depending on system complexity and home configuration. Simple replacements in easily accessible locations often complete in one day, while complex installations with ductwork modifications may require three full days.
Will I have heating or cooling during installation? You’ll typically be without heating or cooling for 1-2 days during HVAC replacement. Plan accordingly by arranging alternative accommodations for sensitive family members or pets, especially during extreme weather conditions.
What should I do to prepare my home? Clear pathways to your current equipment and remove valuable items from work areas. Ensure easy access to electrical panels and outdoor units, and consider temporary relocation for pets who might be stressed by the activity and noise.
How much mess should I expect? Professional installers use protective coverings and clean up thoroughly, but some dust and debris are normal during HVAC replacement. Most of the mess occurs during old system removal, with minimal impact during new equipment installation.
What if problems arise during installation? Experienced contractors handle most issues smoothly, but communication is key during HVAC replacement projects. Address concerns immediately with your project supervisor, and document any changes to the original scope in writing before proceeding.
READ ALSO: How to Easily Avoid Costly Damages as a Homeowner


